

As a small business owner, having an engaging online presence is essential these days, but hiring expensive web designers may not fit your budget. The good news is you can totally handle creating a polished, professional website yourself without any prior experience.
With so many intuitive, affordable website builders out there catering to small business owners' needs, crafting your own site is nowhere near as daunting as it may seem. In fact, with just a willingness to learn and some dedication, you can easily build an eye-catching, effective website that helps your small business thrive.
My name is Jacob Kettner, and my SEO agency has been building websites' for small businesses with SEO in mind for close to 10 years. In this comprehensive guide, we'll walk you through a step-by-step process on how to make a small business website. By the end, not only will you have a fantastic new website, but you'll have also gained valuable skills that can save you money and strengthen your online business capabilities moving forward.
Step 1: Define Your Website Goals and Intent
Kicking off any new website project right means first getting crystal clear on your strategic goals and motivations for having an online presence.
Rather than just jumping into the design details, take time upfront to think holistically about what core objectives you want your website to achieve for your business.
Clearly defining these measurable goals will provide essential direction and focus as you craft the website experience from the ground up.
Some examples of potential business goals your website could drive include:
- Generating new leads - Equip the site with lead capture forms, calls-to-action, and compelling content to convert visitors into leads for your sales pipeline. Track conversions to define success.
- Increasing sales revenue - For ecommerce businesses, focus on website elements that drive online purchases like product pages, shopping cart, and streamlined checkout processes.
- Building brand awareness - Develop a consistent visual identity and messaging aligned with your brand values. Showcase your brand story, vision, and differentiation across all web content.
- Improving customer support - Provide multiple contact channels like phone numbers, email, live chats, and contact forms to field customer inquiries. Answer FAQs through helpful content.
- Reducing marketing costs - Publish value-driven blogging and social content to organically attract and nurture leads over time vs. paid ads. Track lead sources.
- Delivering ROI - For service businesses, emphasize portfolio work, client testimonials, and money-back guarantees to convey value and trust.
Truly knowing your "why" behind wanting an online presence allows you to then make strategic decisions when it comes to elements like design, functionality, messaging, and content.
Align every website and branding choice back to tangible business goals for maximum impact. Avoid getting distracted by just what looks aesthetically pleasing without purpose.
Achieving your goals starts with strategic vision. Use your goals to guide technical decisions, not the other way around. Layout pages, choose visuals, and craft content that moves the needle on your defined objectives.
With your website goals providing a "north star", you can embark on the design and development process with direction to create an exceptional online experience optimized for conversions and ROI.
Step 2: Research Competitor SEO and Optimization
Before diving into your own website design, it's wise to thoroughly analyze competitor websites to learn from and improve upon their SEO and optimization strategies.
Studying market leaders in your industry reveals insights into best practices while highlighting potential gaps you can fill to differentiate your online presence.
Here are key areas to research across top competitors:
SEO Audits
Run competitor sites through in-depth SEO crawlers like Semrush or Ahrefs to reverse engineer their technical optimization efforts:
- What keywords are they ranking for? Analyze which terms drive their traffic to inform your own targeting.
- How fast are their sites? Check page speed KPIs like Time to Interactive. A slow site damages conversions.
- How is their site structured? Note their menu layout, internal linking architecture, and content siloes.
- Do they have a blog? Check if they are using content to build organic rankings over time.
- What is their technical SEO health? Look for errors to avoid and areas you can improve upon.
User Experience (UX)
Analyze competitors from the visitor perspective regarding ease of use:
- How easy is the site to navigate? Note any confusing menus or flows.
- What are their call-to-action placement strategies? See where they convert visitors.
- How well does their content engage users? Look for content gaps you can fill.
- Do they follow UX best practices? Watch for text/color contrast, mobile optimization, etc.
- How is their load speed? Test site pages and note any sluggishness.
Design Elements
Critique visual and branding elements competitors use to market themselves:
- What is their overall aesthetic? Modern, minimalist, bold? Align yours accordingly.
- How do they communicate brand values? Study messaging, images, color schemes.
- What types of content formats do they use? Note video usage, animations, etc that engage.
- Do they have a content upgrade strategy? Watch for gated offers in exchange for emails.
- How do they highlight credibility? Look for testimonials, certifications, etc.
Learning exactly how competitors are connecting with users and converting visitors provides an SEO blueprint and content ideas you can model and iterate upon through your own website.
In-depth competitor analysis yields the insights needed to make smart optimization and design decisions as you build your online presence targeting the same audience.
Step 3: Map Out a Strategic Site Content Plan
Once your goals are defined and you've analyzed competitors, the next step is mapping out the pages and content needed to support your business objectives.
From an SEO perspective, a thoughtful content plan is crucial for effectively targeting relevant topics and keywords that will connect with your audience and improve search visibility.
Here are some essential pages and considerations for planning your website information architecture:
Homepage
- Provides a snapshot of your brand, offerings, and value proposition.
- Include important keyword-focused headers and descriptive content.
- Link to other key pages like About, Services, and Contact.
About Page
- Share your brand origin story and team bios to build trust.
- Mention keywords related to your niche, experience, and qualifications.
- Link to detailed staff bio pages to optimize each person's name.
Services or Products Pages
- Create dedicated pages targeting keywords for each offering or product line.
- Structure content around service-related questions and buyer needs.
- Include extensive product details and images for ecommerce items.
Location Pages
- For local businesses, optimize Google My Business listings plus city pages targeting that location (for multi-location local businesses).
Contact Page
- Provides phone, email, contact form, and social media channel links.
- Mention your location names, call now CTAs, and availability.
FAQ Page
- Answering common customer questions improves user experience.
- Target informational keywords people may search when asking.
Blog
- Publish ongoing educational content around your niche to establish expertise.
- Target keywords and questions your audience has to build organic traffic.
- Link internally to related site content.
Sitemaps
- XML sitemaps help search engines index all pages. Plugins like Rank Math can automatically generate dynamic sitemaps for your website.
Optimize page titles and meta descriptions for every page. Include keywords where relevant, craft compelling content, and link to related pages.
By mapping content and SEO considerations together, you develop a high-performing website tailored to convert visitors.
Step 4: Select Your Web Host
If using an all-in-one website builder, you can skip this step since hosting is included. However, those building a WordPress site will need to secure separate hosting. Don't worry though - choosing beginner-friendly hosting is easy. I highly recommend Bluehost as your hosting provider, which is the official recommendation from WordPress itself. Bluehost delivers an exceptional hosting experience optimized specifically for WordPress sites.
Here's an overview of some key advantages Bluehost provides:
- 24/7 Customer Support - Bluehost offers round-the-clock support via live chat, email, and phone. Their WordPress experts can help troubleshoot any issues.
- Free SSL Certificate - Bluehost installs a free SSL certificate to secure your site with HTTPS encryption. This boosts SEO and ensures safe transactions.
- Free Domain for 1 Year - Signing up gets you a custom domain name for the first year valued at $15 on average. Sweet!
- User-Friendly Dashboard - Manage your hosting right from an intuitive online dashboard for easy site maintenance.
- Built-In Security - Features like automatic malware detection provide rock-solid security and protection.
- WordPress Optimization - Hosting configured specifically for optimal WordPress performance.
Bluehost's starter Basic shared hosting plan begins at just $2.75 per month, providing ample power for most small sites. You can seamlessly scale up as your traffic and storage needs grow.
Other top beginner-friendly hosts to consider include:
- HostGator - Fast shared hosting starting at $2.75/month.
- NameCheap - Great customer support at $2.69 a month
Focus on affordable hosts catering to first-time users if going solo. But for additional management and speed, check out managed WordPress hosts.
By pairing Bluehost or another friendly provider with WordPress, you get an incredibly powerful yet easy-to-manage hosting solution. You'll gain peace of mind knowing your site is backed by optimized security, speed, and support.
Step 5: Register Your Domain
Your domain name, or website address, ideally should align closely with your business name for branding purposes. But finding domain name inspiration can be tricky.
If you're unsure where to start, online domain generators like DomainWheel can provide ideas by combining keywords related to your business:
Some tips for choosing the perfect domain include:
- Ensure it's easy to spell and remember. Avoid convoluted words.
- Shorter is better. Aim for domains under 15 characters when possible.
- Incorporate relevant keywords for your industry. This reinforces your focus.
For more guidance, see our in-depth posts on:
- How to choose a domain name - Details on naming factors.
- Domain name extensions - Pros/cons of .com vs .net vs .biz.
- Best domain generators - Top tools to brainstorm names.
Don't worry about purchasing your domain just yet. When signing up for web hosting, you can register your domain name directly through providers like Bluehost.
If using a website builder like Wix or Squarespace, you'll also be able to seamlessly buy domain names through their dashboards during signup.
The key is to first brainstorm and reserve the perfect domain that aligns with your brand identity. This locks in your unique web address and reinforces your messaging.
With a tailored, brand-reflective domain registered, you ensure customers can easily find and remember your website URL for return visits. Your domain sticks in their minds as memorable representation of your business.
Step 6: Get Started with WordPress
Now for the exciting part - setting up your WordPress site! As an open source content management system, WordPress offers unmatched flexibility and customization for small businesses to build an elegant website.
Why Choose WordPress?
Here are some key advantages of using WordPress for your DIY small business website:
- Completely customizable - Unlimited design options with thousands of free and paid themes. Customize layouts, fonts, colors and more.
- User-friendly editing - Intuitive backend to create and manage pages and content without coding. Perfect for beginners.
- Scalable growth - Easy to adapt your site as your business grows. No limits on bandwidth or storage.
- SEO-optimized - Built-in SEO best practices make sites rank higher in search engines naturally.
- Own your data - You fully own and control your site files and content. Easily migrate between hosts.
- Strong support system - Vast WordPress knowledge base and active community provide guidance.
- Cost-effective - Hosting starts around $5/month. Thousands of free plugins and themes keep costs down.
- Ecommerce capabilities - Sell products right on your site through ecommerce plugins like WooCommerce.
With advantages like these, it's easy to see why WordPress powers over 40% of all websites. The possibilities are endless!
Getting Started with WordPress
To launch your WordPress site, you'll need:
- Web hosting - We recommend affordable hosts like Bluehost starting at $2.75/month.
- Domain name - Choose a brandable .com domain name for your business.
- WordPress installation - Most hosts like Bluehost offer 1-click WordPress installs.
- Customize appearance - Upload logo, choose a theme, tweak colors/fonts.
- Add pages and content - Create your homepage, about us, contact, services pages, blog posts.
- Install plugins - Extend functionality with essential plugins like security and SEO.
Within an hour or two, you can have a complete beautiful WordPress site up and running! With the basics covered, the real fun begins customizing it and publishing great content. Let's build your online presence on the web's most powerful website creation platform.
Install WordPress Software
If using an all-in-one builder like Squarespace, you can skip this step since the software is integrated. However, when hosting on a provider like Bluehost, you'll need to manually install WordPress. But don't fret - it's very easy.
Bluehost makes installing WordPress extremely simple through their intuitive dashboard and one-click setup. Here's an overview of how to get WordPress up and running:
First, log into your Bluehost dashboard and navigate to the "My Sites" section in the left menu. Click on "Add Site" then "Create New Site":

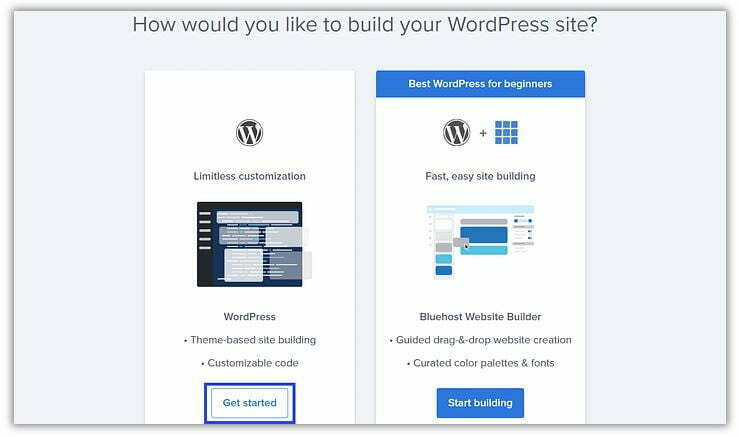
You'll then see options to install WordPress or use Bluehost's website builder. Click "Get Started" in the WordPress box:
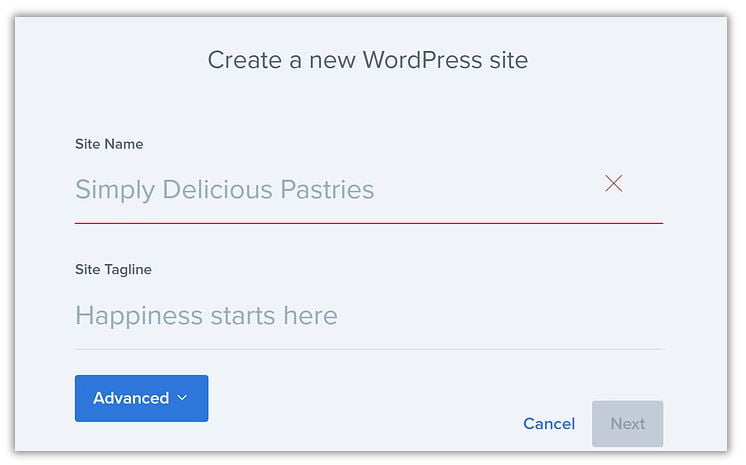
Next, enter your desired website name and tagline. Hit "Next" when ready:
You'll then need to create login credentials by entering an email and password for this new WordPress site. Click "Next".
Bluehost will handle downloading and installing the latest WordPress files. Just wait a few minutes for this automation to complete.
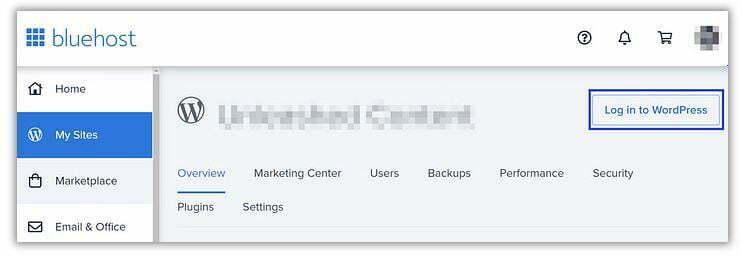
Finally, go back to "My Sites" and click "Manage Site" for your new site domain. Then select "Log in to WordPress" to visit your admin dashboard.
That's it - your WordPress software is installed and ready to go! The initial setup may slightly vary across hosts, so refer to their specific docs if needed.
We also have an in-depth beginner's guide on manually installing WordPress if you ever need step-by-step instructions.
With your hosting and WordPress combined, you have a powerful yet user-friendly foundation for building a website. Bluehost's streamlined automated installation makes launching WordPress a breeze.
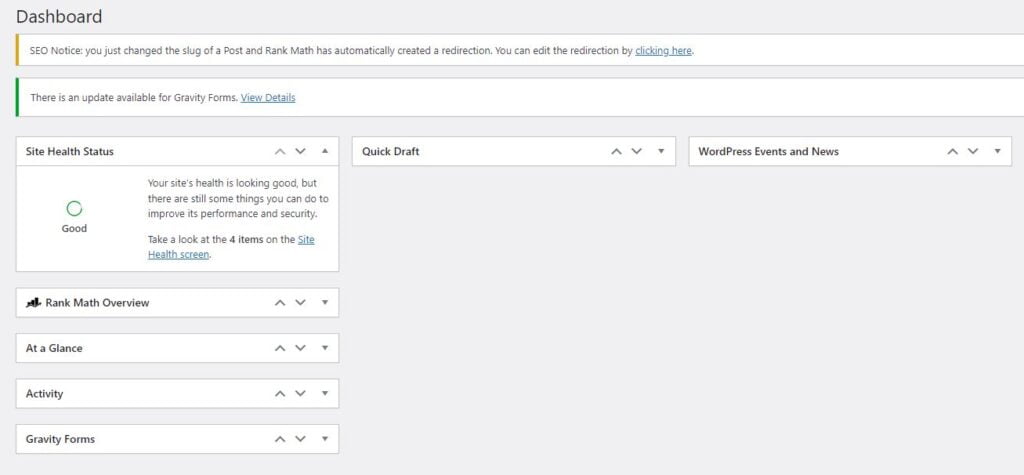
Now the exciting part comes when you log into your new WordPress dashboard for the first time. This is where you'll customize your site by choosing a theme, adding pages, applying plugins, and publishing content.
With WordPress installed, you're ready to start bringing your website vision to life! Feel free to reach out if you need any guidance getting oriented within your new WordPress backend.
Step 7: Select a Theme or Template
WordPress and Squarespace provide a vast array of templates, also called themes in WordPress, that you can customize to match your brand. Many fantastic options are even available for free.
In WordPress, access free themes by going to "Appearance > Themes" in your dashboard:
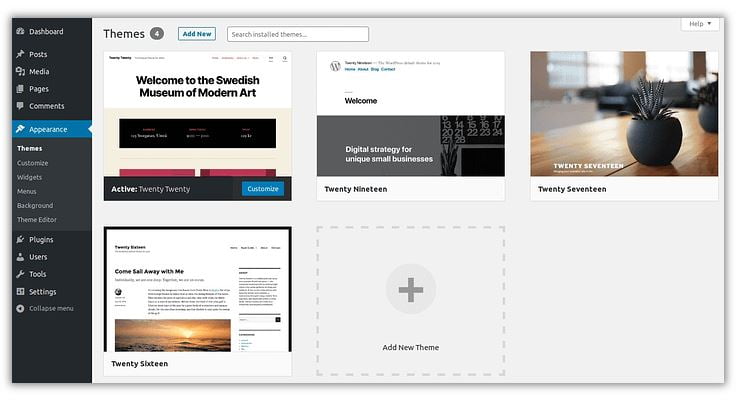
Browse the selection and click "Install" then "Activate" to apply a theme you like to your site. Consider a premium business theme like Neve for more customization capability.
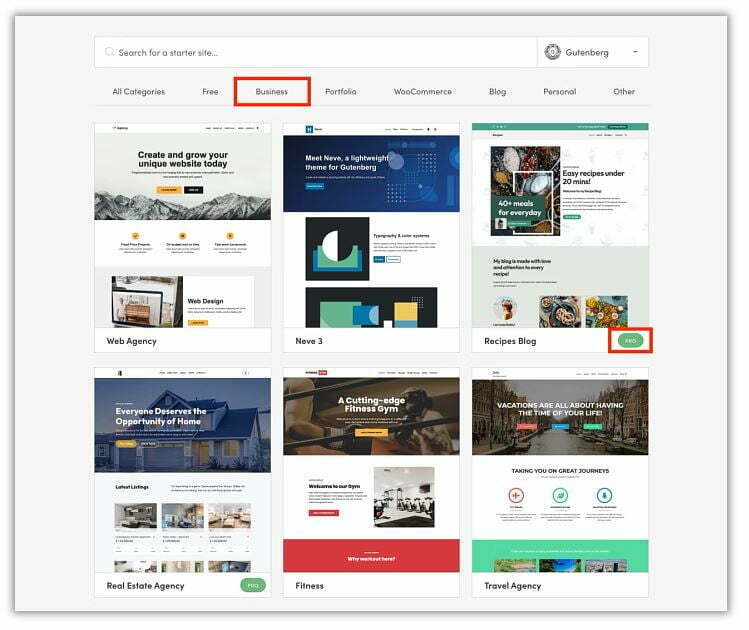
Neve Pro comes with over 100 pre-built starter sites tailored to various small business niches. Many are available in the free Neve theme as well, just look for "Pro only" labels:
With Squarespace, all templates are previewable right on their website. Browse them thoroughly and click "Start With This Design" when you find one that fits:
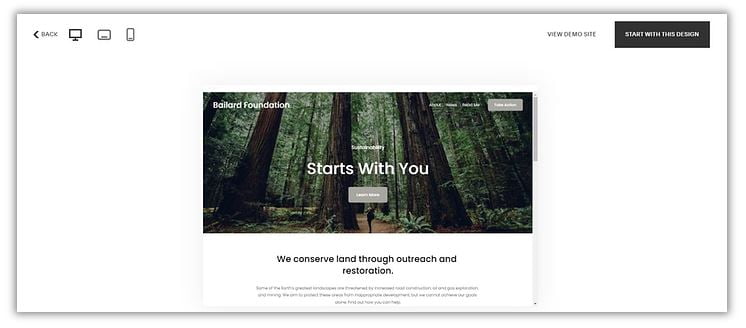
This will bring you into Squarespace's editing mode to start customizing your selected template. Make sure to preview changes on the front-end to ensure they look good.
A few things to evaluate when selecting your theme or template:
- Responsive design - Works on mobile devices?
- Page layout options - Good flexibility?
- Customization settings - Colors, fonts, etc?
- Visual appeal - Aligns with your brand?
- Features - Contact forms, slideshows, etc?
Take your time previewing multiple themes across providers like WordPress and Squarespace. There are hundreds, if not thousands, of options out there!
The right theme visually reinforces your brand identity through colors, fonts, imagery, and layout. Don't be afraid to experiment until you find the perfect fit.
Once installed, dig into customization settings to tweak your theme for a personalized design. This makes the site feel uniquely yours.
With the foundation of a tailored theme in place, you can shift focus to creating and publishing high-value content that captivates your audience.
Step 6: Install Helpful Plugins, Extensions, or Apps
Plugins, extensions, and apps extend the functionality of WordPress, Squarespace, and Wix respectively. They allow you to add capabilities without coding knowledge.
WordPress has over 60,000 free and paid plugins, Squarespace offers hundreds of extensions, and Wix provides over 500 apps to enhance websites.
With so many options, it may be tempting to go plugin crazy. But too many can slow down your site. We recommend focusing on plugins and extensions that address:
- Performance - Cache and database plugins like WP-Rocket speed up sites. Image compressors like Imagify optimize visuals.
- Security - Security solutions like Sucuri protect against threats. Use their free or premium options.
- Backups - Regular backups via plugins like UpdraftPlus are essential for disaster recovery.
- SEO - Enable proper search optimization with SEO plugins like Yoast (beginner-friendly) or RankMath (advanced capabilities). Read our guide on the best seo tools for a small business.
- Ecommerce - If selling products online, ecommerce plugins like WooCommerce for WordPress power stores.
When evaluating plugins and extensions, look for:
- High user ratings and regular updates
- Positive user feedback indicating quality support
- Alignment with your site's needs and goals
A few great plugins provide immense value, but restraint is key. Prioritize your must-have features to avoid bloating your site with unnecessary addons.
Treat plugins and extensions as solutions to address specific needs, not just nice-to-have extras. Carefully consider how each aligns with your goals.
With strategic plugin selection, you can efficiently give your DIY small business site the capabilities required to thrive without compromising speed or security. The right add-ons tailored to your needs empower your online presence.
The Importance of CDNs for Small Business Websites
A CDN (content delivery network) can dramatically improve website performance by serving cached static content from servers distributed geographically closer to each visitor. This reduces latency and provides a faster experience.
CDNs are especially valuable for small business websites that attract visitors from a wider region versus just locally. The enhanced speed improves SEO while providing better UX.
One of the most popular CDN services is Cloudflare, which offers a free plan perfect for small business sites. Enabling Cloudflare is simple:
Guide to Setting up Cloudflare
Step 1) Create a free Cloudflare account
Step 2) Change your domain DNS settings to Cloudflare by following their setup guide
Step 3) Select a Cloudflare plan. The Free option works great if you don't need advanced features.
Step 4) Cloudflare will now serve your static resources like images, CSS, and JS files through their global network.
You'll immediately notice website speed improvements thanks to assets loading faster. Just be sure to cache static content on the server-side too.
Combined with performance best practices like image compression and caching, Cloudflare can help small business sites load significantly faster for visitors worldwide. This streamlines UX while unlocking greater organic reach.
Step 7: Add Your Website Content
When initially building out your website, it's wise to start with a rough site structure in mind. Most small business websites need some essential pages:
- Homepage - Provides an overview of your business and navigation to other pages.
- Services/Products/Portfolio - Showcases your offerings and calls visitors to action.
- About - Share your brand story and team to build trust.
- Contact - Include a contact form and social media links for outreach.
- Testimonials - Display client feedback to utilize social proof principles.
- FAQ - Answering common questions saves customers and staff time.
- Blog - Publish posts to establish expertise and thought leadership.
With WordPress, Squarespace, and other DIY builders, creating customized pages is simple. You have total freedom to tailor content to your needs.
When writing page content, focus on:
- Crafting scannable intros and headers using keywords. Break up dense paragraphs.
- Explaining your offerings in a benefits-driven manner.
- Providing value to site visitors through helpful information.
- Using visuals like images, charts, and videos to engage visitors.
- Embedding calls-to-action to guide visitors to convert.
Producing strategic, high-quality content establishes trust and positions your brand as an authority. Prioritize crafting pages that capture your brand identity and appeal to your target customer base.
Content is the backbone of an exceptional website. Take the time to create pages that align with your goals, resonate with your audience, and convey your unique value and voice.
With a structured site and engaging content, you have a solid foundation. Next you can apply finising touches like SEO optimizations, email capture forms, social media icons and more.
Step 9: Publish Your Website
Once your website design is complete and content is ready, it's time for the big reveal! However, before promoting your site, it's wise to run through a few final checks:
- Mobile preview - Validate responsiveness by viewing your site on phones and tablets.
- Content audit - Proofread all text for errors, filler content, etc.
- Page speed tests - Confirm fast load times using Google PageSpeed Insights.
- Broken link checks - Verify all navigation links are functioning properly.
- Security scan - Check for vulnerabilities using a tool like ScreamingFrog.
- Backups - Manually backup your site files and database before launch using a plugin like All-in-1.
- Search engine submission - Submit your site to Google Search Console for indexing.
For WordPress sites, your content will be public immediately after installation. However, builders like Wix and Squarespace allow you to stay private while building.
When ready to go live, utilize promotion strategies like:
- Email existing customers announcing your new website.
- Promote the launch on your social media profiles.
- Reach out to industry media contacts like bloggers for coverage opportunities.
- Run contests encouraging social shares or email signups.
- Invest in online ads to increase initial traffic and awareness.
- Publish lots of helpful blog content to build SEO over time.
- Add calls-to-action across your site encouraging visitors to convert.
With a high-quality website and strategic promotion, you gain an invaluable online asset and brand awareness driver. Be proud of the investment you've made in your business' digital presence!
Going live is only the beginning. Continually refine your content and leverage analytics to optimize the site for your goals over time.
What is the average cost to build a small business website?
For a basic DIY website on a platform like WordPress, the average cost is $100-$300 which includes web hosting, a domain name, theme, and some stock images. Hiring a web developer averages $1,000-$5,000 or more depending on custom functionality.
What are some tips for speeding up my small business site?
Enable caching, compress images, minimize plugins, optimize code, use a CDN, and leverage browser caching. Host on optimized servers like WPEngine. Test speed with PageSpeed Insights.
Should I build my site myself or hire a web developer?
If you have some technical aptitude and don't need advanced custom features, DIY site builders like WordPress are perfect for small business owners. But if you need a truly custom-coded solution, hiring a developer may be worth the investment.
How do I make my small business website stand out?
Focus on conveying your brand story, values and purpose. Use high-quality photos and videos that humanize your company. Make content scannable with engaging headers, lists, and quotes. Include unique offerings not easily replicated.
What are essential pages to include on a small business site?
Make sure to have a home, about, services/products, contact, and blog page at minimum. Other important pages are FAQ, testimonials, portfolio, team bios, and location/franchise pages if applicable.
How do I market my new small business website?
Create social media graphics and posts driving people to your new site. Email customers and partners announcing it. Pursue PR opportunities like local magazine or radio interviews. Network at local events and promotions.
What SEO basics should I implement for a small biz site?
Optimize page titles and meta descriptions. Target less competitive long-tail keywords across content. Interlink internal pages using keywords. Leverage alt text on images. Ensure site is mobile-friendly.